Follow these necklace assembly instructions to get your Treetop Trove wooden necklace.
Unpack and Lay out
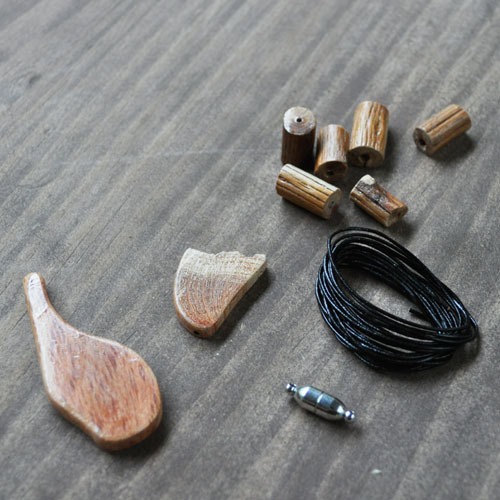
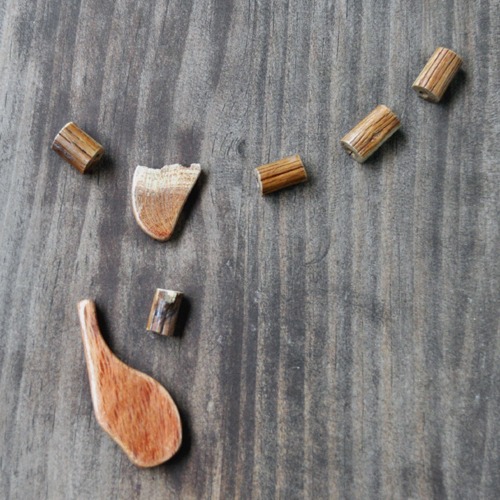
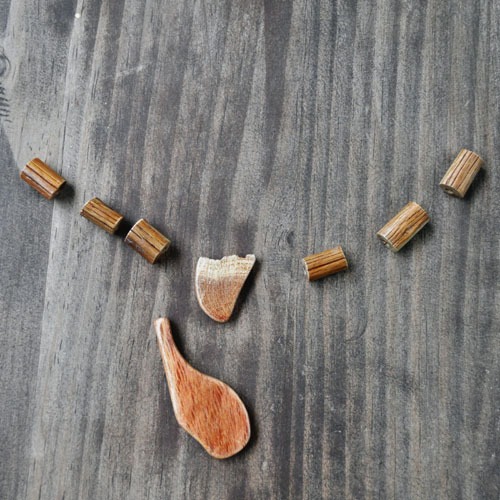
While the look may vary according to the necklace you have chosen, your pack will include:
1 x Pendant
1 x Junction
6 x Beads
1 x Length of cord
1 x Magnetic clasp
Prior to tying any knots it’s a good idea to decide on the layout you are looking to achieve.
Here are a couple of examples but ultimately it’s entirely up to you.
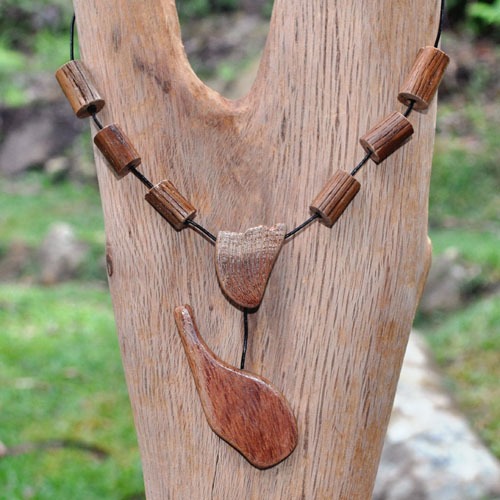
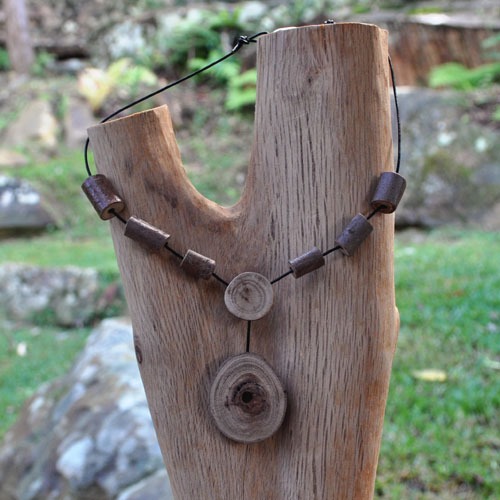
Symmetrical and Asymmetrical example layouts.
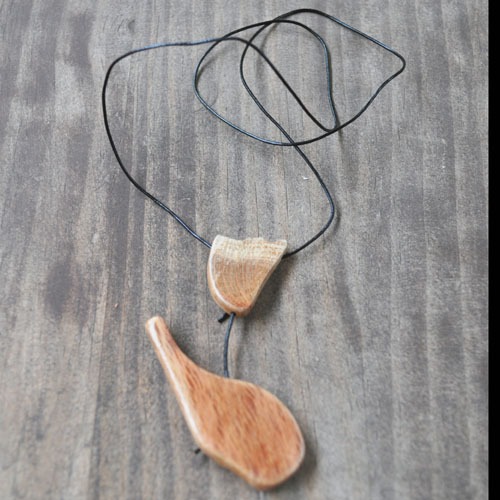
Assembly
In this example we will be making the symmetrical design laid out above.
Step 1
Begin with the pendant.
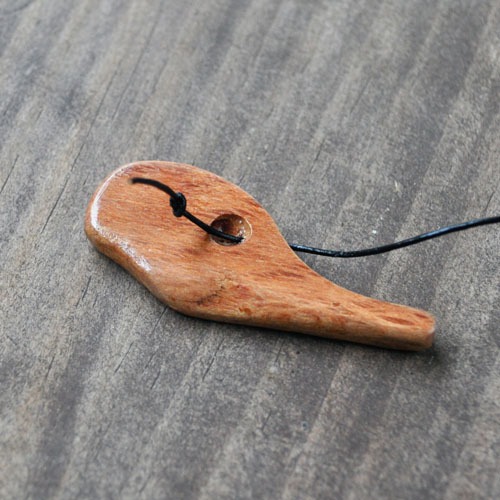
Thread the cord through the hole in the pendant and tie a knot in the end.
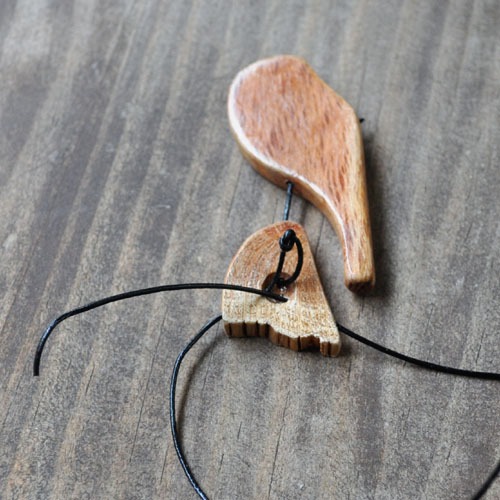
Step 2
Next, take the junction piece. It will have three holes in the sides so you’ll need to choose one to be at the bottom when the necklace is worn.
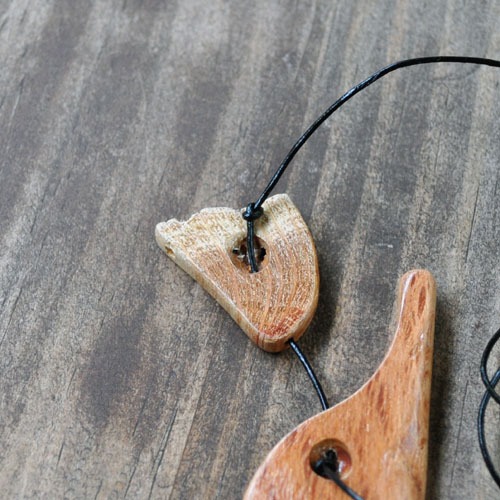
Thread the cord through the bottom hole so it pokes out the centre and tie a positioning knot so that the pendant hangs with a small gap below the junction.
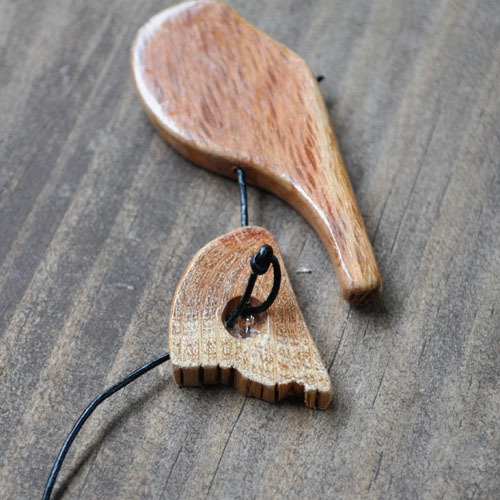
Step 3
With the positioning knot secure, thread the cord through one of the other holes in the junction. Loop it around through the remaining hole in the junction as shown below and secure it with a knot.
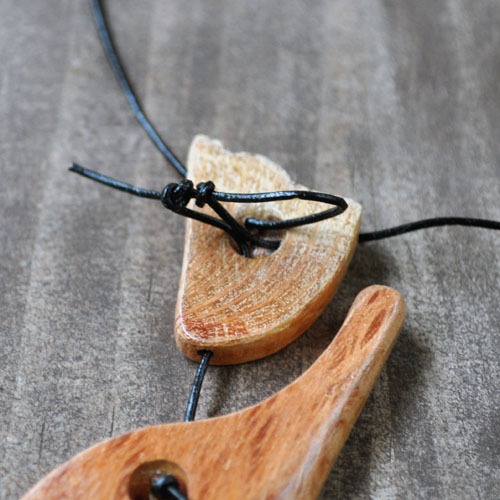
Step 4
Take the loop of cord and cut it in the middle.

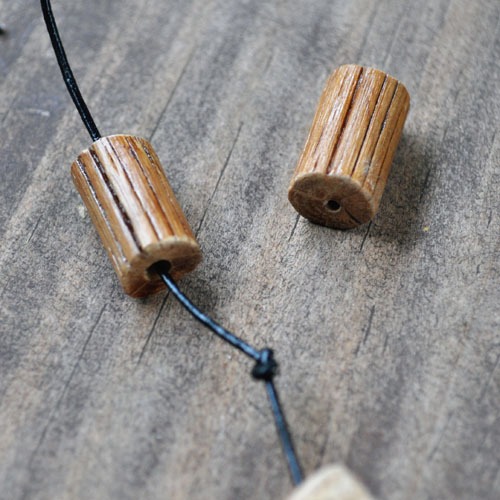
Step 5
Each bead will have a large hole at one end. This is designed to allow you to position the bead on the cord with a hidden knot. Simply tie a knot in the cord where you would like the bead to sit before threading the bead.

Step 6
Thread each end of the magnetic clasp onto the cord and secure with a knot.
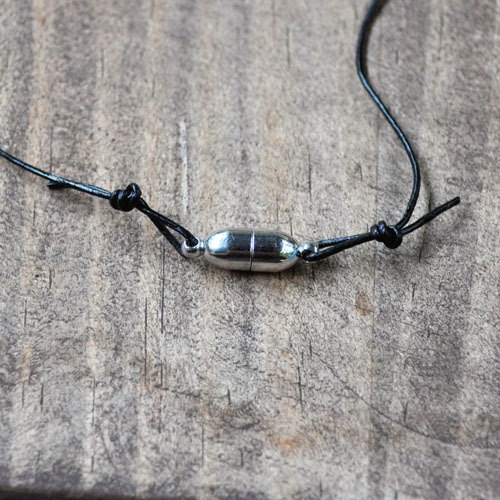
Finally trim the ends off the cord neat the knots so that they fit snugly into the recesses.
With the ends trimmed and knots secure, your new necklace is ready to wear.
