A few years ago now I was trying to think of something different to do for Valentine’s Day when I remembered seeing a set of vases hanging on the wall of a shop and decided to see if I could make something similar. This hanging vase project is the result.
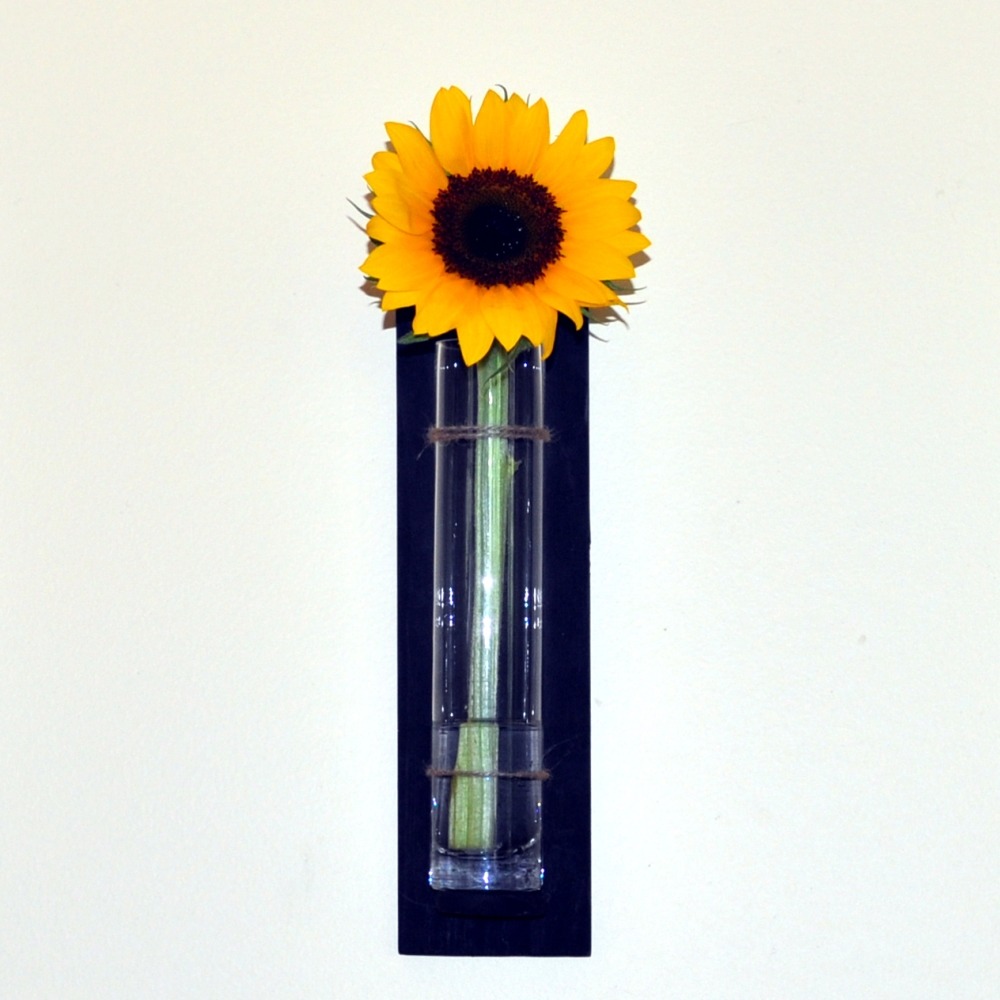
The vases look especially good when used with sunflowers and work well together when placed on a wall together in a pair or group of three.
What you need to make a hanging vase
Materials
- A plank of Pine board measuring at least 30cm long, 9cm wide and 2cm deep.
- A piece of dowel, 7mm in diameter by 3cm long.
- About one meter of string.
- One glass vase with a diameter of about 2.5cm and a length of about 25cm.
- Wood glue.
- Black paint.
Tools
- A saw, hand or power to trim the board.
- A drill with 7mm and 2mm bits.
- Sand paper.
- A pair of Scissors.
Directions
Step One: Cut the hanging vase board to size
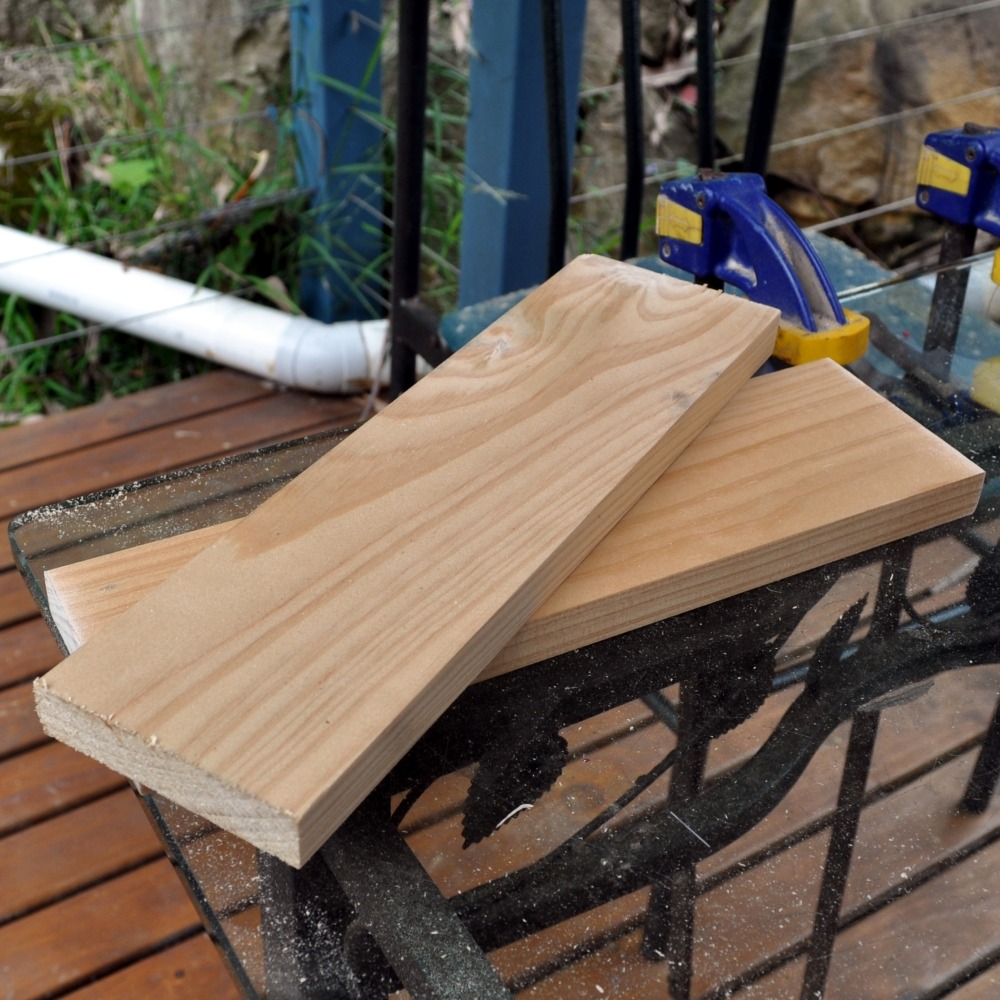
Cut and trim your Pine board to the required dimensions and use the sandpaper to tidy up any rough edges so you can work with the wood without getting splinters.
The finished board should be 30cm long.
Note: The length of the wood is ultimately determined by the length of the vase you use. If the vase is longer than 25cm, just adjust the length of the board to match.
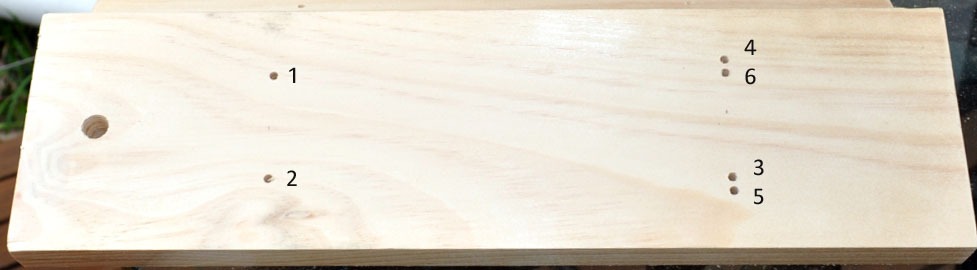
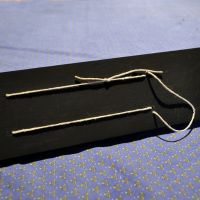
Step Two: Mark up and drill holes
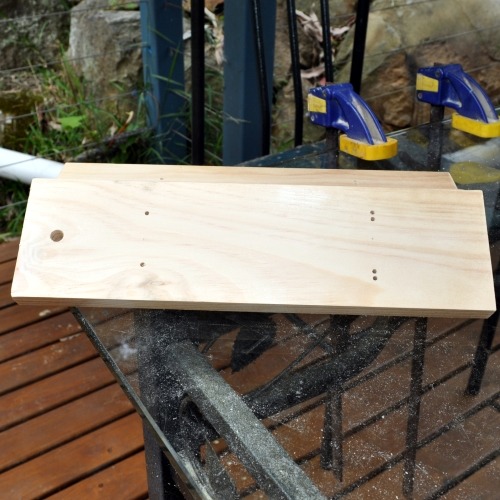
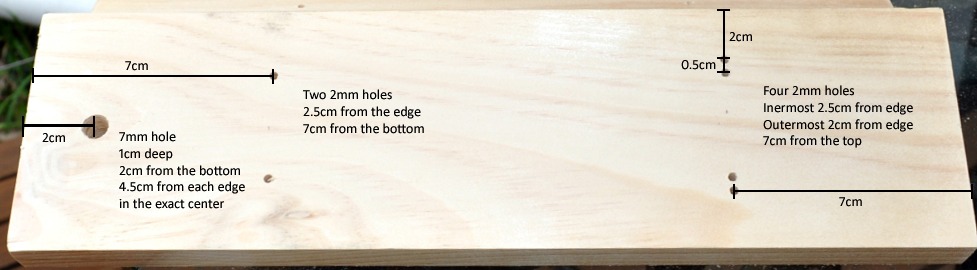
In total you need to drill seven holes in the board as follows:
- Two 2mm diameter holes that are 7cm from the bottom of the board, are each 2.5cm from their respective sides and that go right through the board.
- One 7mm diameter hole that is 2cm from the bottom of the board centred 4.5cm from each side and is 1cm deep. A depth gage can be used to prevent drilling through the board.
- Two 2mm diameter holes that are 7cm from the top of the board, are each 2.5cm from their respective sides and that go right through the board.
- Two 2mm diameter holes that are 7cm from the top of the board, are each 2.0cm from their respective sides and that go right through the board.
The picture below shows the layout and measurements:
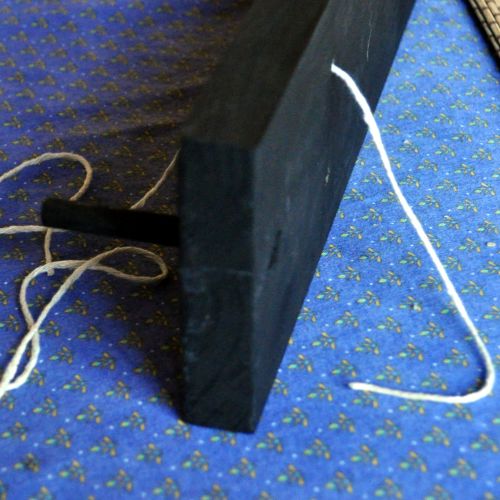
Step Three: Prepare and affix the dowel that will support the vase
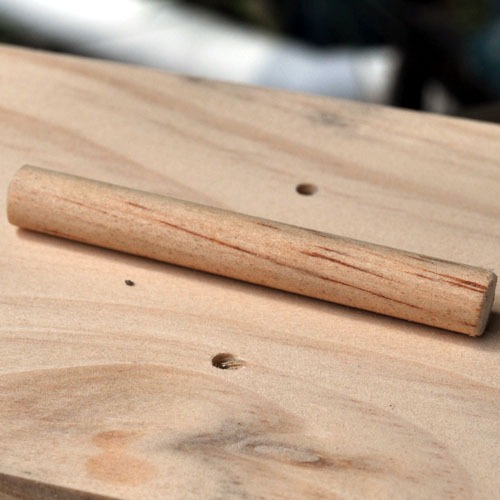
Cut the dowel to a length of 3cm and use the sandpaper to smooth and slightly round off the ends.
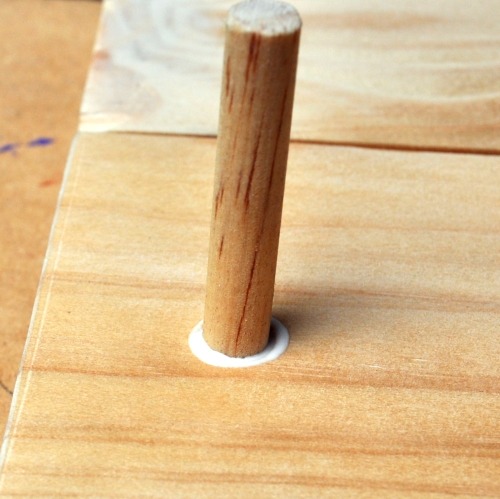
Apply a little wood glue to one end of the dowel and push it into the 7mm hole. If it is quite a snug fit, a gentle tap with a hammer or a piece of offcut wood may be required to get it to go in.
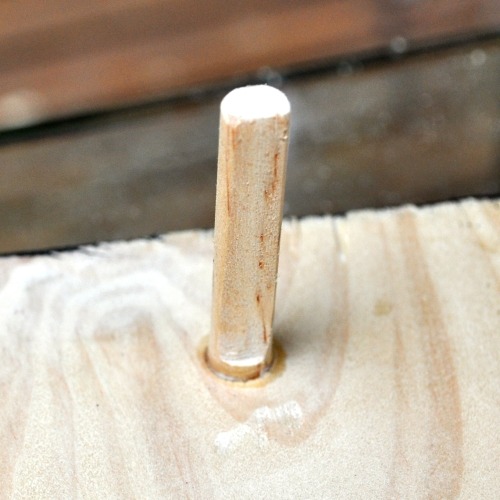
As an optional step if you have a power sander, once the glue is dry you can sand the top of the dowel flat to provide a better surface for the vase to sit on.
Note: If you accidentally drill right through the board when trying to drill the 1cm deep hole, just add an extra centimetre to the length of the dowel.
Step Four: Sand back and paint
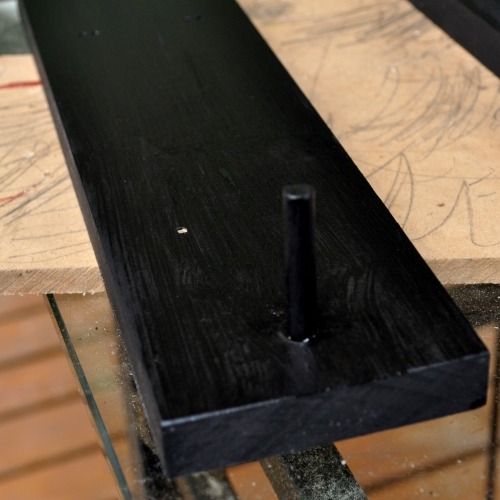
Use the sandpaper to round of any sharp corners and ensure that all the surfaces are clean and smooth. With the sanding complete, wipe the wood down with a slightly damp cloth to ensure all dust is removed.
At this point, once any moisture has evaporated the piece is ready to paint. Depending on the paint you have, you may need one or two coats.
Note: While painting, you will need to ensure that the six holes in the board do not get clogged or blocked. You can do this by poking a toothpick through each hole to ensure any paint that has got inside will not block it.
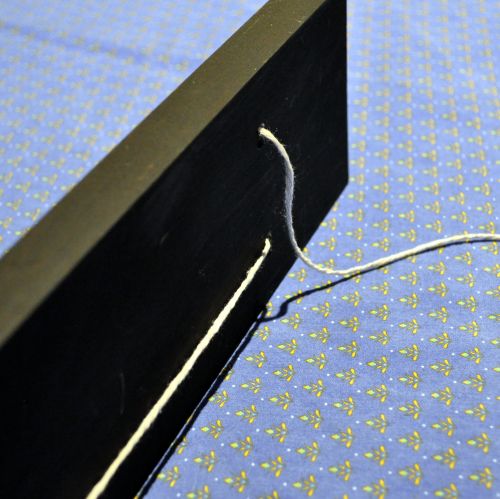
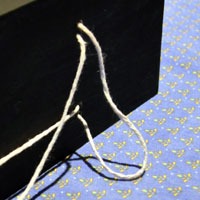
Step Five: Thread the string that will secure the hanging vase
Threading the string may look a daunting task but is actually quite straight forward. The following picture shows the order in which the string should be passed through the board.
The string you use must be at least one meter in length when you start.
Starting from the back of the board, thread the string through hole 1 and pull it through until there is about 15 – 20 cm left at the back.

Loop the long end back around through hole 2 and pull the string through.
Make sure you leave a loop big enough to fit your vase through at the front of the board.
Next, on the back of the board, run the string from hole 2 and thread it through hole 3.
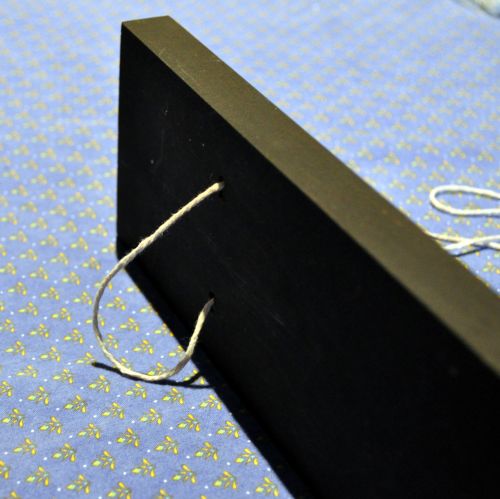
Return the string back through hole 4 on the front of the board and pull through. Again make sure to leave a loop big enough for your vase.
Take the string from hole 4 and thread it through hole 5. Again, leave some slack so that you have a loop that is big enough to use to hang the vase.
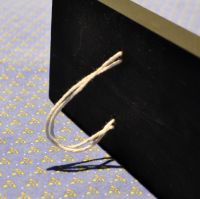
On the front finish off by threading the string back through the final hole(6). This will give you a nice double loop to hold the top of the vase. There will also be enough string left on the back to tie a good knot to hold the whole thing together.
With the knot tied the knot is tied and the end of the string trimmed you are now able to insert the vase and pull the hanging string tight to ensure it is held firmly in place.

Step Six: Add the Vase and hang
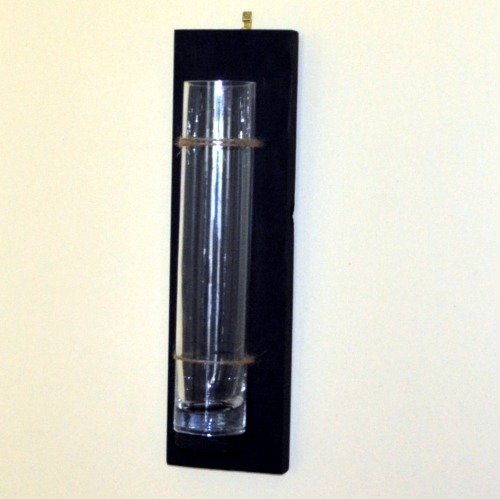
The project is now complete. To install the hanging vase, simply check to make sure that the vase is held firmly in place and hang it on a wall hook.
To finish off, just add a nice sunflower and a little water before stepping back to enjoy.
Don’t stop with one hanging vase
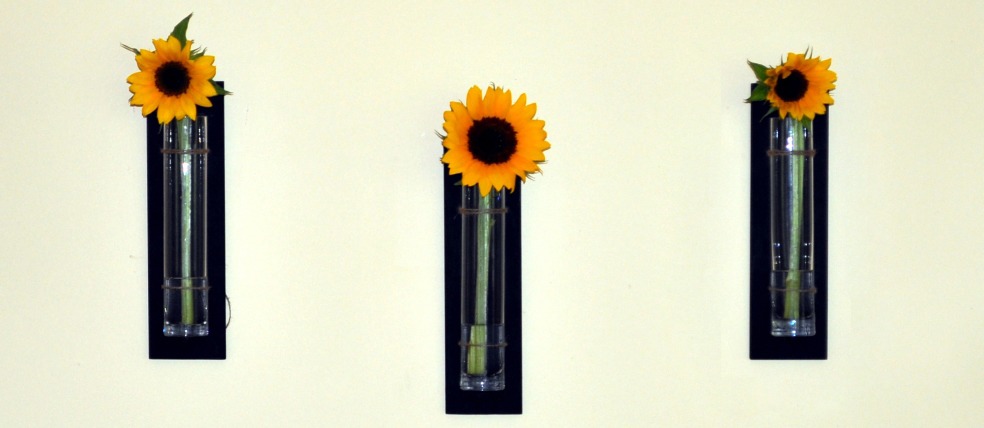
What could be better than one hanging vase? Why, three of them of course. They look particularly good when hung together. As they are so easy to make. Why not make more and play with the arrangement.